Showing posts with label Sewing Adventures. Show all posts

An 1860's Bonnet: Part 1

A verrry long time ago I started tearing apart a straw bonnet that didn't have the right shape, got frustrated, and didn't think about bonnets again until the beginning of this year. While gearing up for Gettysburg, I simply needed a bonnet. I've never really made a bonnet before but of course I decided to make my first a hard one.

I got bit by the drawn-bonnet-bug after seeing a grad student/friend of mine make an absolutely lovely reproduction of a bonnet she found tucked away in the hat boxes at the theater department. Her reproduction was stunning. She used a silver shot taffeta and wire frame.

From seeing her process, I became really intrigued with making one, but first I had to see whether or not a drawn bonnet would be appropriate for the American Civil War years (1860-1865). In my research (and people, feel free to correct me if I'm wrong) it seems that the drawn bonnet style was definitely more popular before the 1860s, and isn't as widespread up through 1865. That was kind of a bummer, but I dug a little deeper. I searched through fashion plates, seeing one occasionally, and would randomly come across a cute bonnet from museum sites only to find out that it's a child's bonnet or some other such nonsense.

Look how precious! But it's a child's bonnet :(
A little bit about Civil War Era Bonnets:  Bonnet styles progress like any other type of fashion, some years they're in, some years they're out, some years they're round, some years they're not. Specifically, from 1860-65 the "spoon bonnet" became popular. The "spoon" refers to the profile view of the bonnet looking like a spoon, having a gentle curved and slightly pronounced brim at the top; and from the front view it has an egg like shape, much like a spoon. Also, during these years, the caul of the bonnet was somewhat shallow and had a pretty steep grade from brim to crown. 

After having so much trouble finding an okay bonnet with the correct shape and being a drawn bonnet (that I like and want to reproduce) I was forced to use Pinterest. LE GASP! Now, I will say this with a disclaimer:
PINTEREST IS NOT A FULLPROOF SEARCH TOOL AND NOT EVERYTHING ON PINTEREST IS WHAT IT SAYS IT IS. ANYTHING YOU SEE ON PINTEREST COULD BE A FRAUD AND IT IS YOUR RESPONSIBILITY TO RESEARCH SAID PHOTO TO VERIFY IT'S AUTHENTICITY.
So, in essence, everything on Pinterest must be taken with a grain of salt. Pinterest can be a great search tool as there are so many photos linked with great websites. Unfortunately it is not always the case. I encourage any person who finds an intriguing photo from Pinterest to find out its original source and give said source due credit. End Rant.

*swoon*
The bonnet I found is from Time Traveler's Antiques. It is a drawn bonnet, which isn't altogether shocking, but the shape of it is definitely of the 1860s. You can see in the photo how high the top of the brim is, it is not round like most of the drawn bonnets from the 1850s, definitely spoon shaped. Now, the caul of the bonnet doesn't have a very steep grade, but the trimmings are concentrated at the top of the head, which also point to the 1860s.


So, this is the bonnet I am to recreate, just with a different color scheme. The next post shall be about the construction!

Fabric!

Hooray! I finally got my fabric in for Harriet's gown!

Its first emergence from the box! SQUEEEE!!!!
It's little more teal in color than I was expecting, but it'll work beautifully, nontheless. I purchased this beauty from Nicole at silkfabric on Etsy. It is a silk velvet, very soft and light hand and is really just great. I love the sheen it has to it. 


This is a more accurate depiction of the color of the gown
Harriet Foster Carr Wedding Gown, 1888
Athens County Historical Society
Here is my fabric! As you can see, a little more teal, but almost spot on!
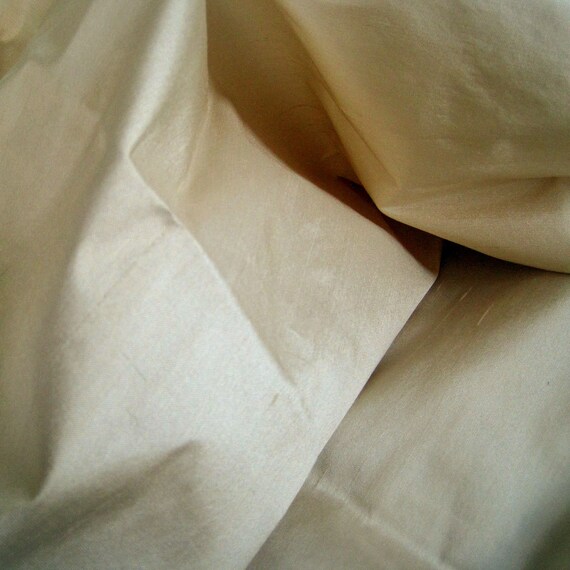
For the lining of the jacket, I purchased a Silk Dupioni in an Almond-Beige color from ThreadrareDestash ,also on Etsy. It's pretty similar to the original lining, but I may have to purchase more, as I entered the wrong amount on my original transaction... :(

Lining of jacket
Harriet Foster Carr's Wedding Gown, 1888
Athens County Historical Society
This is the picture from Etsy, I couldn't get a good picture of it myself
I'm excited to be working on the project in the coming weeks! It has to be done by Dec 17th!!!!

1885-1887 Cotton Corset

Along with working on Harriet's gown, I am going to be doing a living history presentation at the Athens County Historical Society in February. For the living history project, I am going to interpret for a middling class seamstress, as Harriet was. I have no garments suitable for the time period so I have to make them all.
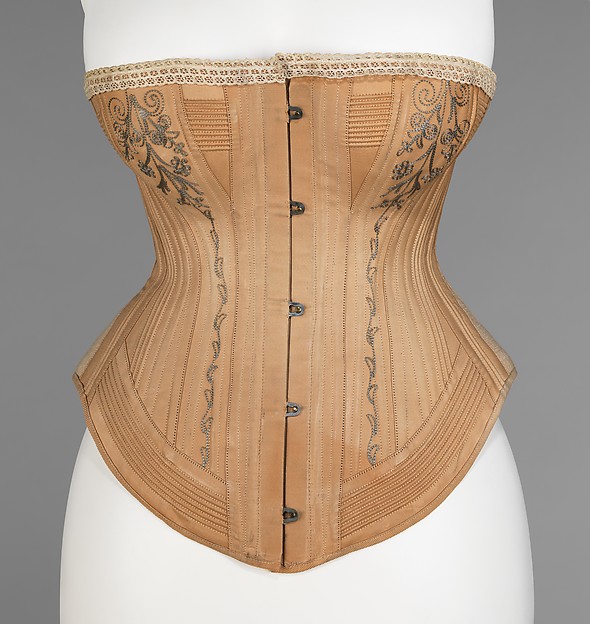
Cotton American Corset, ca1885-1887Metropolitan Museum of Art
I have decided to undertake reproducing an American cotton corset from the 1880s. This corset is on display at the Metropolitan Museum of Art and I fell in love with it on the first glance. I love the blue tambour-work on the front panels. It is from a little earlier than when Harriet made her gown, but it's safe to assume that being in "rural Ohio", even with Ohio University, that everyday styles were a little behind (probably no more than 5 years) for practicality reasons.

The only measurements given by the Met are the corset being 13.5" long at center back. So I decided to make it my own measurements, which are: 33" Bust, 28"Waist, and 35"Hip. My other corsets bring me down to a 23-24" waist, but it's sometimes uncomfortable because the smallest measurements result in complete closure at center back. I also know I could go a couple inches more (with proper training of course)

So, this corset will keep the same silhouette as the original garment, while allowing there to be some wiggle room for my waist sizes. Here was my process: I decided what size I want my waist to be at its smallest; I chose 22". Then I deducted around 2.5" from all my measurements (with the new waist measurement) to allow for whatever room between my laces that I want to maintain. This made the measurements of my corset to be ridiculously small: 30"B, 19"W, 32.5"H


Pretty Pattern Pieces
 I flat patterned the corset, using Corsets: Historical Patterns and Techniques and Corsets and Crinolines as visual reference. ^Here are my pattern pieces looking all pretty^

I hadn't been able to find twill fabric in the color I wanted for a good enough price, so I improv'd. I found a pair of $3 Goodwill khakis (size 12) and went from there.


yay $3!
You can kinda see the nestling I did with the pieces.
After the pieces were drawn onto the fabric, I did some embroidery. I did tambour work using a doily hook.
"Tambour"
Then I put some pieces together!

I wasn't able to keep the exact number of bones or cording channels as the original, mainly because I think the one I'm making is significantly smaller than the original. The overall effect of the corset seems to be on the right track, but we'll see when I have the front and back pieces in. My busk hasn't come in yet, and I've not made the grommets in the back piece. But here are some pics of my progress:
Woo back!
The Front!
(and only held together with the waist-tape)

Harriet Foster Carr

I'm very excited to let you all know of my latest project! I am currently working with the Athens County Historical Society to replicate a gown they have in their collection, for my senior capstone project. The gown belonged to a woman named Harriet (Hattie) Foster, who was born ca. 1860 in Athens, Ohio and married Albert Carr in 1888. Harriet made this gown for her April wedding using a pattern from the Godey's Lady's Book/Magazine. The gown is made of teal silk velvet, lined with an almond-beige silk dupioni.

I plan to make this gown using my White Treadle Sewing Machine and replicate it as it was made originally by Harriet (more on that later)

Here are a few pictures of the gown on display. More to come as the gown and research get underway!


Wedding Gown, 1888, Athens County HistoricalSociety

Photos courtesy of the Athens County Historical Society, Wedding Gown exhibit.

Welcome, Ms White.

Hello all! I'm back after a long hiatus. I'm not dead, if any of you were wondering. A little has changed since I last posted, I finally got a job! Not an awesome job costuming for some company or organization, but a waitressing job. I'm working 5 days a week, so that plus school, plus everything else has been keeping me busy. But, I am sure glad I got that job.

Because with my first paycheck I bought:
My newest toy

....A Treadle Machine! This particular model is from 1890...edit! After further research I have found that it is actually from 1912. Patented last in 1890. and is the White brand from Cleveland, Ohio.
Gorgeous.
  The colors on the machine are superb and has very little rust or discoloration.

See the bright green silk???
 I also found while rummaging through the 6 drawers on the original cabinet, 5 extra bobbins and 4 extra needles. Though, the needles are mostly rusted, it's still amazing that it's all together. The bobbins also have silk tread on them. I have no idea when it was last used.

The pedal is deceptively responsive
 Here's the underside, again showing off the brand name.

The tin itself was just cool.
And the coolest part... Another goodie I found inside the drawers of the cabinet... a tin box with:

11 attachments! For what? I have no clue.
 A ton of attachments! And the original packer's slip!


Also, the hardest part to find for this model is the bobbin shuttle. I found 2 inside the tin.

They're weird and evil looking.
 ....and one in the machine itself! with a bobbin inside as well!


 I'm so excited to clean it up and get it working. I need to purchase a new belt, but other than that it seems to work exactly how it's supposed to.


 I bought this lovely piece from an antique dealer here in Athens. He had bought it 30 years ago and had it as furniture in his own home. He told me that when he moved 10 years ago, he put it in his shop to sell. Unfortunately, or more fortunately for me, it ended up being put to the back of his shop and got buried underneath things. I came in a month ago, just wondering if he had any sewing machines and he pointed me to this one.... I fell in love. Just look at the tiger-stripes!


 He then told me he just needed to get it out of his shop and would part with it for $100. It was mine.


Carrying it up my two flights of steps was certainly an adventure. My mom and I aren't built for such things. She now lives in my apartment, almost ready for use.


I'm so excited about getting going. I don't know much about the machines, other than what they go for. If any of you have tips on using them, PLEASE let me know. Any help is welcome!

The Hat

 My absolute ultimate, ultimate-ultimate favorite project for the Margaret Hunter Millinery Shop was recreating a hat from a painting. This painting, to be exact:


Lady Edward Bentinck,
Painted by George Romney
LOVE, LOVE, LOVE!!!!
The portrait is of Lady Edward Bentinck. The date on the painting, I could not find, although it would have had to have been after 1780 because Miss Elizabeth Cumberland married Lord Edward in 1780, thus taking his name and reference in the painting. The story on the portrait itself is that Lady Bentinck was trying on hats and picked up this "old fashioned one." The painter, George Romney, saw her put it on and had to paint her portrait. Still, I cannot find the exact date.

The hat in the portrait seems to hint that it was a straw hat to begin with (seeing the slight ridges along the brim) and covered tightly with white silk, bunched silk gauze at the crown then finished with a lovely, large blue bow.

Working on the straw
I can't tell you how much fun I had on this project. It always seemed to make me hungry. I always got comments that it looked like a wonderful dessert. It really does look like meringue...

That is a wool cherry ;)

mmmmmm..."Food" Porn.

The hat was lined with a changable blue silk which was also used for the bow at the side as well as the ties. I love it because it's a surprise when you see the underside, the rest of the hat is so very white!


The lovely blue lining, all my stitches too!
Here it is finished, sigh. I'm definitely going to make another very similar. It now belongs to Doris, the Journeywoman Mantua Maker and Milliner, at the shop!


"The Lady Bentinck"
I'll model it for you...

What do you think? I think it turned out pretty well ;)


Bad News Bears.

Hello all! Again, I am so sorry about not getting around to blogging. Things are busy here in Williamsburg and it seems I could never get the chance. And now, there's a new wrinkle in the fabric...

My computer CRASHED. That's right. It crashed. Last weekend I had managed to accidentally unplug it from its power source and it went haywire from there. I'm writing this post using a friend's computer, so unfortunately I most likely won't be able to blog about the things I've made until I get back to Athens; when I either can get my computer fixed or get a new one.

To give you all a taste of what I will be blogging about; While interning here I've made a ton of items including a cap, petticoat, kerchief, mitts, and various parts of gowns and am currently working on a hat. :D :D :D :D :D :D :D :D :D :D :D :D  It's a really pretty hat too. :)

Well, I hope you all are having a glorious summer! I'm having a blast here in Williamsburg and can't wait to fill you in on my wonderful summer!

Internship Beginnings

Saturday marked the end of my first week interning at the Margaret Hunter Shop in Colonial Williamsburg. So far I have had a blast!
Our work area, Right to Left;
Eliza (fellow intern), Doris (Journeywoman) Tori (fellow intern)
and me! At the Margaret Hunter Shop

The staff is extremely friendly, and every day proves to be more enjoyable than the last.

My typical outfit for the day time.
So far we've worked on perfecting our stitches and I patched and mended a cute blue jacket that I love to wear.

Such lovely patchwork, wouldn't you say?
Then on Saturday we got all "gussied up" in beautiful silk gowns and wonderful hats. We walked about town, letting millions of little girls take pictures with us.

Us ladies of the Millinery Shop (I'm first on the left)
Don't we look lovely?!


Me in a Coral gown (I do not normally
wear this color)

Eliza in a peach, ivory and green cross-stripe gown
I got to wear a coral Polonaise gown with silk gauze and a bum roll; feeling wonderful. The other intern, my new friend Eliza, got to wear a Saque-Back gown and AWESOME HAT. I was jealous.

All in all, we've had a wonderful time so far. Things keep getting better, and we're getting into some more "serious sewing"; which we're very excited about. More to come!

Ophelia Bodice: finished

 Hooray! The time has come to show you the finished pictures of the Ophelia Bodice! After 2.5 weeks of working on lots of beading and tucking the finished product was sent to Santa Fe on Friday to be graded. And here are the pictures from an impromptu photo shoot right before it was sent away. My mom was the photographer and did a fabulous job :)


This pose was mom's idea.
I'm pretty happy that it looks almost identical
to my concept drawing


I thought she was only taking a pic of the bodice, not of
my face with it
 My mom thought it a good idea to take the other curtain and wrap it around as a skirt, so the pictures would look a little better. It did help the photos, but you can still see the creases!

I've got a bit o' giraffe neck goin' on.

I was trying to pose as my drawing, but closed my
eyes at the wrong time :(
 The following pictures are not the correct color, but thought they were fun and should be included in my post XD

Cheese!

I think I saw a fox in the field, which is why I'm squinting...

Close up!!!!


I can't wait to get it back and start the skirt portion! But I need some undergarments first....hmmmm