The Queen of Tucks

I think it should be my new nickname because I have sewn over 350 tucks for the trim of the bodice. That's. A. Lot. Of. Tucks.

Just some of the tucks...
The tucked trim had to be done in 6 pieces to get the length and contour correct. And it took a very long time to do them all. Looking back, I should have done a large rectangle then cut it down into the strips needed, but I did it the other way around; cut a bunch of strips THEN did the tucking. Well, now I know what not to do. Despite the intense labor, after they were pressed and all put together, they look kinda fabulous--I'm not gonna lie.

Aren't they perfect?
Now the scary part... application...There were a couple ideas thrown around on how to apply them. I couldn't think of any other fullproof plan than to simply top stitched them to the bodice. It was nerve-wracking, I'll tell ya, to sew all those tucks to the bodice. The whole time I was consumed by a fear that something utterly terrible would happen.

Pinned and ready to go...
After being stitched.
But it didn't! After all was said and done they look pretty spectacular (I was fully expecting them to look very terrible) I was also nervous that having the tucks the same fabric as the main part of the bodice would be a bad idea, but I think the texture is all it needed. The last pic is taken in natural light, so it's the closest to the real color as you can get. and you can see the texture really well. I'm really excited for the next post. You'll be able to see it finished!

Project: Progress

The project is done, but you all will just have to wait to see it. For now, I'm gonna give you little snippets of it so I can make my posts more detailed!

And now back to the project: After a little bit of tweaking, I got the modesty panel to be just right... I had a really hard time getting the pretend chiffon to work properly... or how I wanted. I had to manually pin each gather where they were supposed to be, instead of the usual, gathering-thread-then-sew method. It was kind of a pain, but I managed.

It is lined with the same hospital sheets I used for my Regency petticoat. It was finished with a chiffon edge.


Panel, not yet attached.
In attempts to make sure the panel was the right shape and fit, I got a little creative.

I don't think I've looked that attractive
in a long time...
Idk.
yeahhhhh....
Well, maybe I got a lot creative. It seemed to look okay though....

So, with the panel now done, I inserted it after the sleeves in; and here's what it looked like:

On my clone.
 Isn't the turquoise-blue gorgeous????

On me and my late 1860's corset XD
I don't have a 1910's corset yet, so I'm improving with the one I do have. Since this is only for the top of the gown, I figured there wouldn't be much of a difference in size or shape.

Next step....TUCKING!

Beading!

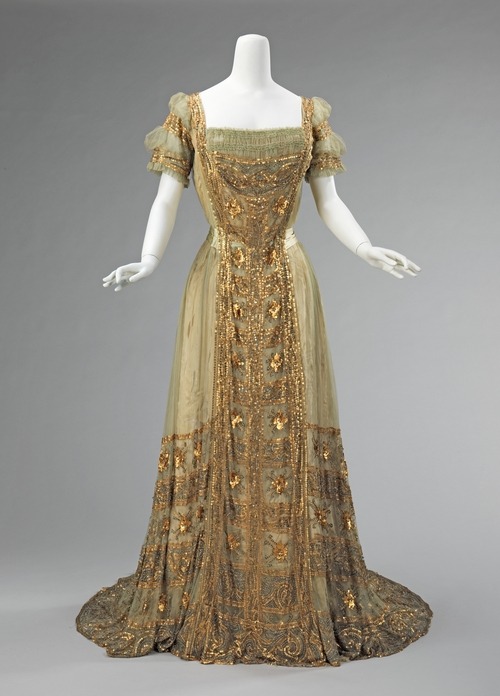
For hours, upon hours, I spent my time trying to find a good image of 1910's beading on gowns. I wanted to find a design from the period, to keep it authentic as possible. Well, I had very little luck finding anything with any real detail to help me. There are lots of great pictures of garments, but none close enough to see it! The best I was able to procure were pictures like this:


All to small....

...to be of...
...any help.
I even checked out beading patterns for purses, I wasn't able to find a design/motif from the period that I really liked. So I used a postcard for "inspiration" and proceeded created my own design. I just wanted a hint of the pink beads and used mainly the green and pale turquoise, like in the postcard.

The Wonderful Postcard.
I had never done beading before and I found that it's certainly not a hard thing to do. But it is TIME CONSUMING. Lucky I had Netflix because I watched the entire season of Firefly, plus the movie, Serenity, and the 2nd season of LOST to finish both sleeves.

Before I applied the beads, I finished all the edges with a "chiffon hem" It really helped keeping it from fraying and looked nice too. Then I did the beading before sewing the arm 'round because the fabric was flattest and easiest to work with. And BAM!

Here's the motif I created
 Then I finished off the sleeves with French Seams.

First run with French Seams! 


And Voila! Pretty sleeves! I'm really happy with them, they lay nicely (just like in the design picture) and to my delight, the colors are far more muted than I was expecting! My mom took some great detail photos, too. Yay Momma!

Doesn't wicker furniture make wonderful scenery?
A pretty feather. I think I'm most proud of this one.
Not exactly matching garments, but the sleeve lays nicely.
Lilies... that don't really look like lilies...
:D

Final Project: 19-teens "Ophelia" Gown Bodice

I'm taking a Specialty Sewing Techniques course, which consists of different couture techniques and finishing methods. This is what I'm making for the final project:


For the project, we have to use at least 4 techniques we have learned in class and apply them to a blouse/shirt type garment. My techniques will be tucking, piping, beading, ruching and hem treatments. I'm going to make the gown in two pieces for now and put the two pieces together to complete the gown... just at a later date.


The turquoise silk cost me a mere 5 bucks for 6.5 yards!
Discounted Drapes. BOOYAAH!
 It's a vest type garment in a powdery turquoise silk with attached sleeves in a nice creme chiffon and ruching in net at the bust. There will be a copious amount of delicate tucking as trim in the blue silk and in the belt part. I'm also planning to have a beaded motif on the sleeves and overlay for the skirt. Look at the the beads I got! They go so prettily with it.


The colors are a little more muted in real life.

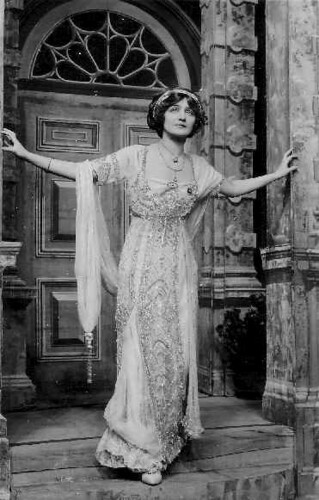
I was initially inspired by the actress Miss Lily Elsie. Her gowns and pictures are phenomenal. 

She has Rachel Weisz' profile.
Sigh

How perfect, right?

My second inspiration was the idea of Ophelia. Whenever I think of Ophelia (from Hamlet) I think of water lilies and consequently Lily Elsie.
I don't really care about the title, just the design.
It's so pretty!!!
The project has to be sent to Santa Fe, NM by June 3rd... leaving me 2 weeks to get it finished. Luckily, I only have to send in the bodice :D No sweat!


Regency Dress progress

So far this quarter, I've been trying to juggle taking a mere 12 credit hours (I normally take about 17), piano lessons and life. But here's the progress on the Regency dress!

Certainly not the most beautiful pic
of me, but there's the dress.
The pics have the dress pinned together (sans sleeves) in what I hope it will look like. I decided to gather them Corded style, so wonderfully explained by The Dreamstress...though, I did mine by hand instead of machine.
pretttttyyyyyy!
 I really like the cording method rather than a running stitch. It's way more secure and delivers the most gorgeous gathers! I do believe I will use this method of gathering from now on.

Notice the cream yarn? I'm using it for my cord instead of real cord. Why? It doesn't have a tendency to bulge, requires a very thin channel and I have a ton of it. Yay thriftiness!!!
Le View de Side
You can kinda see the cording on the skirt portion in the side view ANNNND you can also see the Apron-front line. I decided to do something a little different than the typical apron front bodices I've seen. I got the idea from the dress Marianne twists her ankle in.
I understand this is not Marianne, but
it is the same dress, just from Persuasion (2007)
Now, I realize that these pics are not of Marianne, but for viewing purposes, the stills from Persuasion (2007) are a lot more illustrative. The bodice piece is a gathered trapezoid creating a more seamless effect, so in theory, you won't be able to tell if it's an apron front or not... but we'll see how sneaky I actually am later on, when it's closer to finished.*crosses fingers*
See how the lines are angled?

I'm still not positive on the style of the sleeves yet. I'm torn between elbow length or cap. Sometimes I wish I could do both, but it would look rather silly.

I'm in a BOOK!!!

Hello friends, I wanted to announce that I have been blurbed about in an official Star Wars Book!!
OOOOOOOOooooooooooooooo!!!!
 In Feb 2010, I was interviewed via email, by Bonnie Burton, to be featured on the Official Star Wars blog. I had been checking that blog every day for 9 months and was somewhat disappointed that I hadn't seen anything on there yet. Then I got the email that perked up my spirits... She had chosen to put me in her newest book, The Star Wars Craft Book! It came in today.....and here I am!
AAAHHHHH!!!!!!
If any of you get a hold of the book, I'm on page 102 and am featured for my General Grievous. As a Star Wars fanatic, I can't tell you how honored/excited/awesome it feels just to have that little blurb in there :)
Aside from me, there's some awesome crafts that I think I may do in the near future. My faves are the Cantina Band spoons and Ewok Hat. AHHH, I want to make them noowwwww!!!! I was like a nerd at Comic-Con. ( BTW, I will attend in the near future). Other features include blurbs about Sammi Resendes, Kayla Kromer, and Amanda Jean Camarillo. All of which have made some pretty awesome things. 

All in all, the book is a great book for adults AND kids, I highly suggest you purchase it.

P.S.
Speaking of Star Wars, I have a new shirt to show off:
DAWWWW.
A surprise gift from my friend Travis of Debugging-Life It has become one of my favorite shirts of all times. Thanks man!

Phew, What a day... What. A. Day. :D

Early Regency Dress, start-up

For my first Regency Dress, I have chosen to do a really simple style to be as a "basic" dress for my wardrobe.

It's a simple cotton print and I believe it might be mattress ticking, but it's awful thin. The fabric is pretty sheer and wrinkles easy, as you can tell. I've got 14 yards of it, so if I mess up, there's more to use! My only fear with the fabric is how stiff it gets when you iron it. I washed it twice to get the sizing out and break it down a bit. It turned to a lovely drape, but the ironing is kind of worrisome. Darn stuff.


For the style, I turned to one of my favorite movies. I really love the dresses in the 1995 Sense and Sensibility. Most have the slightly lower waistline and very drapey fabrics that make my heart go a flutter.

I love the drawsting neckline and sheer fabric
It will be more full like this gown,
and will also have 3/4th sleeves


The entire dress will be handstitched; like the short stays and petticoat I made to go under it.

Randomness.

This has nothing to do with much, but it's cool. I scanned my face and this was the outcome:
It's like I'm stuck under the ice!
My hair looks cool

BIG NEWS!

!!!!I am going to be interning at Colonial Williamsburg this summer!!!!

I will be working in the Margaret Hunter Millinery/Mantua Maker Shop, making lots of pretty things and being far away from home! AHHHHHH!!!!!! I'm so excited :)

The Margaret Hunter Millinery Shop
 Part of the reason I am ecstatic about this opportunity stems from my visit to Colonial Williamsburg when I was about 11 or 12. My family and I had gone to visit and I wanted a dress like the girls had in the brochure that we had. So we all went over to the Margaret Hunter shop to check it out. I was overwhelmed when we first walked in. There were ladies at the counter, all dressed to the 9's in their Colonial Outfits, embroidering diligently on Lady Dunmore's gown. Off to the corner, I remember a little girl, about my age, also working diligently on a little something. All at once she got up in excitement and said to the nearest lady at the counter, "I think I figured out how they do this!"  Can I tell you how jealous I was of that other girl???? Very. I wanted to be at Colonial Williamsburg, working on something, while wearing pretty clothes..... And it turns out, that little hope I had as a child is going to come true!

Now, I only need a place to stay/sublease/rent. I haven't had much luck in the 2 days I have been looking, but hopefully something will turn up.

Darth Maul Amigurumi progress

GRRRRRRR!!!
 I've been working here and there on Darth Maul's face since winter break started, and decided to scrap what I had originally made to make a new one. Here's the original flub:

it's truly disgusting.
See how grotesque it is? It looks like the clown from the SAW movies with red and black detailing. Gross!

After inspecting my fail, I decided that I used the wrong hook (which is why the thing was as big as my own head) I was color changing wrong and I didn't really think about what I was doing while making it. This time I've thought it through, am color changing correctly (I think?) and I'm using a much smaller hook, which produces much cleaner results :)

Here's what I've got so far:
muuuch better.
I'm able to get a little more detail and sharpness in the lines about his face, all due to the smaller hook. The rest of the detailing will come with embroidery, as there's no way to get such lines in color-changes.

The contours of the head and face are also
very nice this go 'round
Contour. This is something the original dearly lacked. It was really just a big ball with color changes that I stuffed and cinched to get somewhat of a face and produced a weird lumpy head and nasty, nasty face. This one looks much better :) I'm hoping to finish the head by Friday. Woo!